
Products
FILTER CLOTH REPLACEMENT
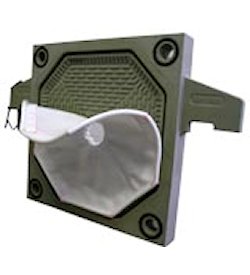 There are three (3) different kinds of cloths on a filter press: the head cloth, which is for the first plate and is a single cloth with a hole in the center; the tail cloth, which is for the last plate and is also a single cloth but with NO HOLE in the center; and the intermediate cloths, which are all the cloths on the plates between the head and the tail. These cloths are double cloths, with one cloth on each side of each plate, and the hole in the center of each side is connected by a short cloth tube.
HEAD CLOTH REPLACEMENT
- All of the plates can be removed from the filter press with the exception of head plate; therefore, remove plates as necessary to provide sufficient access to the head plate.
- Using a spanner wrench, remove the center cloth nut from the cloth side of the head plate, while leaving the center feed mounting nut, located behind the cloth, in place.
- Taking care not to damage the plastic plate, insert a thin bladed screw driver into the groove at the outer edge of the filter cloth and pry a small section of the cloth out of the groove, or if the cloths are not to be reused, cut a ~6” slit into the cloth about 1” away from one of the corners.
- Grab the exposed cloth from step 3 with vise grip pliers or equivalent, and pull the remaining cloth out of the groove.
- Inspect and remove any accumulated solids from the groove.
- Aliening the new cloth into position by lining up the corners of the cloth to the corners of the plate, and reinstall the spanner nut.
- Using the cloth installation tool, pound the sewn-in bead or caulk of the filter cloth into the groove of the filter press plate. Ensure that the caulk has been fully seated to the bottom of the groove. Advance around the groove pounding in about 2” to 3” at a time.
TAIL CLOTH REPLACEMENT
- Taking care not to damage the plastic plate, insert a thin bladed screw driver into the groove at the outer edge of the filter cloth and pry a small section of the cloth out of the groove, or if the cloths are not to be reused, cut a ~6” slit into the cloth about 1” away from one of the corners of the cloth.
- Grab the exposed cloth from step 1 with vise grip pliers or equivalent, and pull the remaining cloth out of the groove.
- Inspect and remove any accumulated solids from the groove.
- Aliening the new cloth into position by lining up the corners of the cloth to the corners of the plate.
- Using the cloth installation tool, pound the sewn-in bead or caulk of the filter cloth, into the groove of the filter press plate. Ensure that the caulk has been fully seated to the bottom of the groove. Advance around the groove by pounding in about 2” to 3” at a time.
INTERMEDIATE CLOTH REPLACEMENT
- Taking care not to damage the plastic plate, insert a thin bladed screw driver into the one of the grooves at the outer edge of the filter cloth and pry a small section of the cloth out of the groove, or if the cloths are not to be reused, cut a ~6” slit into the cloth about 1” away from one of the corners of the cloth.
- Repeat step 1 to the other groove on the other side of the filter plate.
- Grab the exposed cloth from step 1 with vise grip pliers or equivalent, and pull the remaining cloth out of the groove.
- Repeat step 3 to the other side of the plate.
- Fold the one side of the filter cloth in such a way that it can pass through the hole in the center of the filter plate, and push the cloth through the plate and discard appropriately.
- Inspect and remove any accumulated solids from the groove on both sides of the filter plate.
- Fold one side of the new cloth in such a way that it can pass through the hole in the center of the filter plate, and pass the cloth through the hole in the center of the filter cloth.
- Aliening the new cloth into position by lining up the corners of the cloth to the corners of the plate.
- Using the cloth installation tool, pound the sewn-in bead or caulk of the filter cloth, into the groove of the filter press plate. Ensure that the caulk has been fully seated to the bottom of the groove. Advance around the groove by pounding in about 2” to 3” at a time.
- Repeat step 9 to the other side of the filter press plate and cloth.
- Repeat steps 1 through 10 for each intermediate plate of the filter press.
 WARNING:
Take care in putting the plates back into the filter press. There are two different kinds of plates. They are designated as a one button plate or a three button plate. The plates can be identified by a drill hole that is about 1/4” deep, in the handle of the plate. The one button will have one hole and the three button will have three holes.
The head plate is usually a one button plate. The next plate MUST be a three button plate then a one button and so on. The filter press plate sequence is 1-3-1-3, and so on. If this order is not correct, the filter cake will not dry properly during the Blowdown process.